

Marinero – 6
*Melt coating production
Jürgen Leßlhumer from Wood K Plus wrote a summary based on interview questions:
- Can you explain what exact materials are used to create the sample 1 textured filament?
For the production of the textured filament we used a high viscosity polyamide 6 (PA6) from DSM. The used PA6 is a film extrusion grade and was recommended by the supplier for the production of 3D printing filaments. It is lubricated and a food contact quality.
Material specific properties:
- Viscosity number: 210 cm3/g
- Melt Viscosity (260 °C): 1120 Pa s
- Density: 1130 kg/m3
In general polyamide 6 is a semi-crystalline thermoplastic polymer and is made by ring-opening polymerization of ε-caprolactam.
- How does this production process work? Please explain step by step.
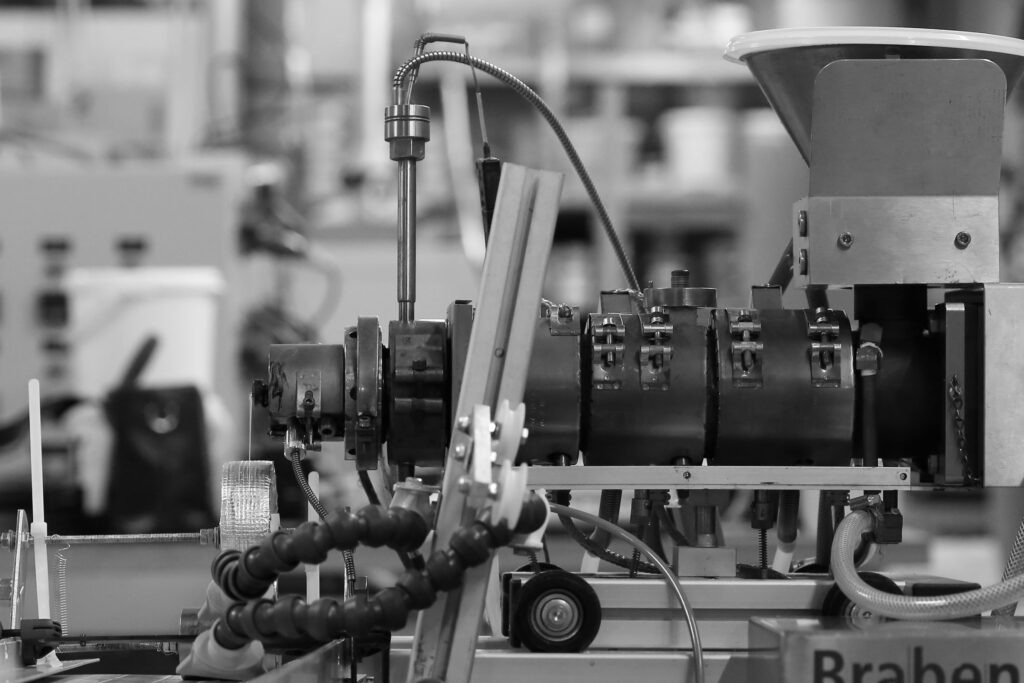
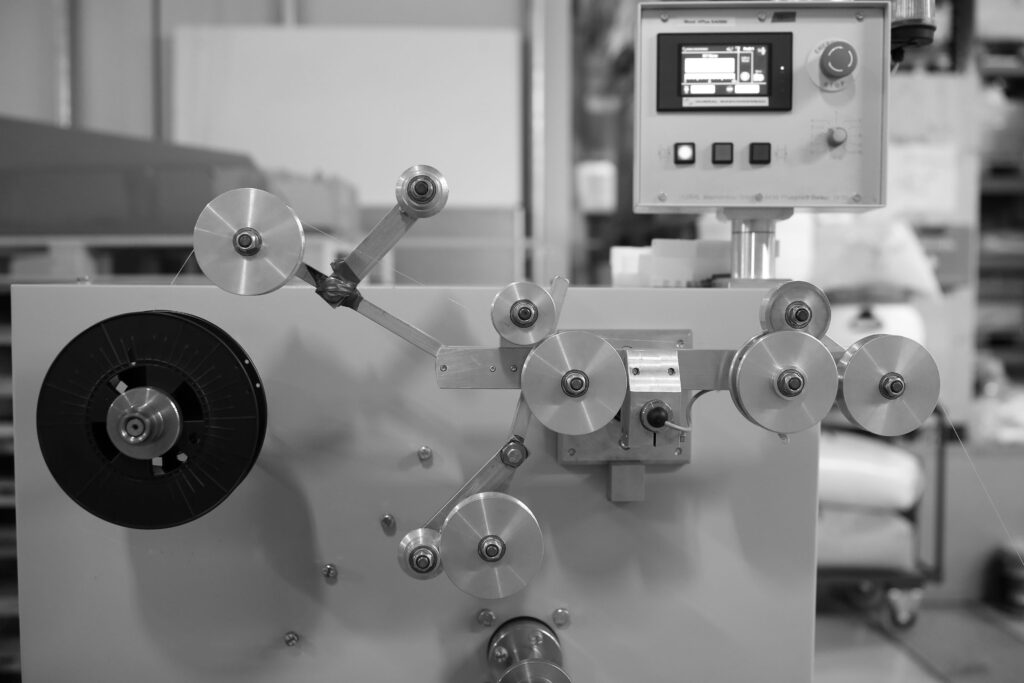
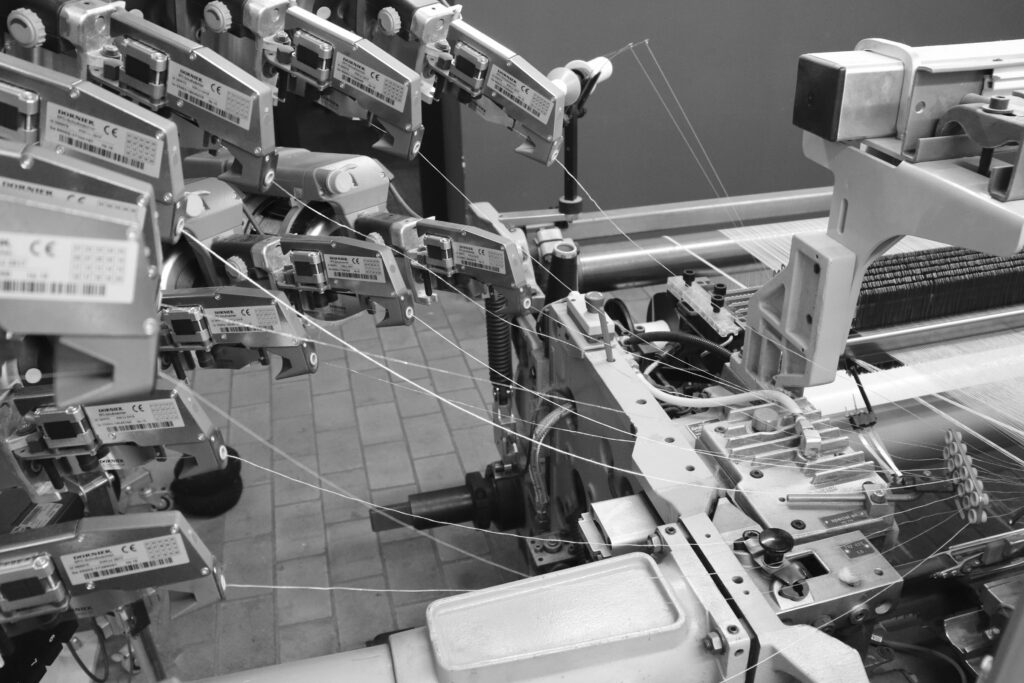
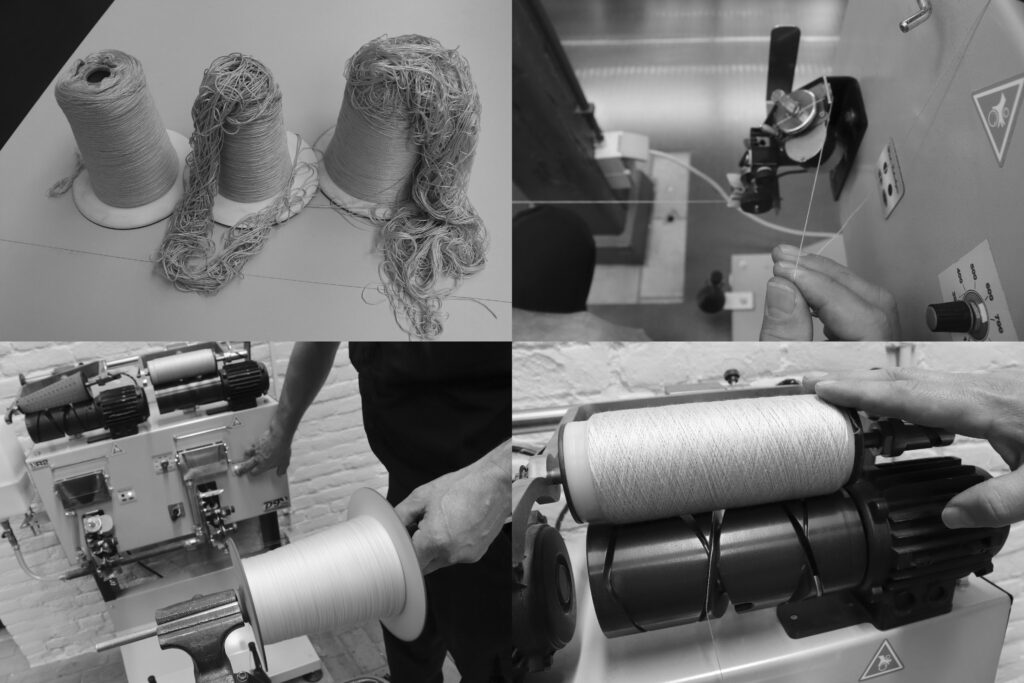
For the production of the textured filament we used the following machinery:
- Conical twin-screw extruder with hole-die
- Single-screw feeder
- Self-made stamping unit (embossing roller + pressure roller)
- Cooling via band-conveyer (air)
- Haul off unit
- Winding unit
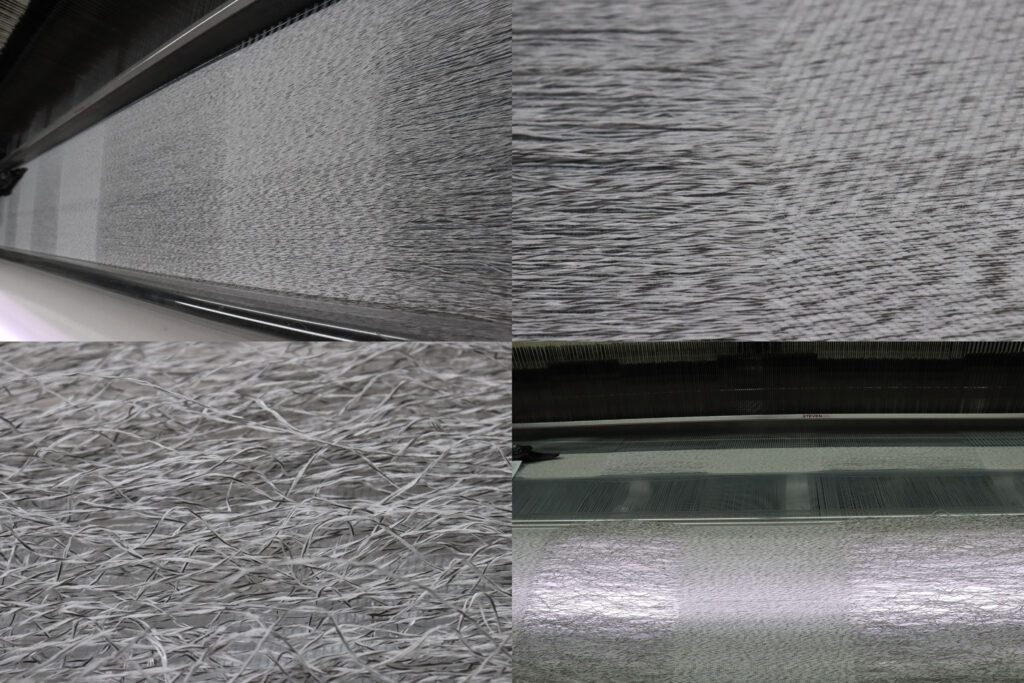
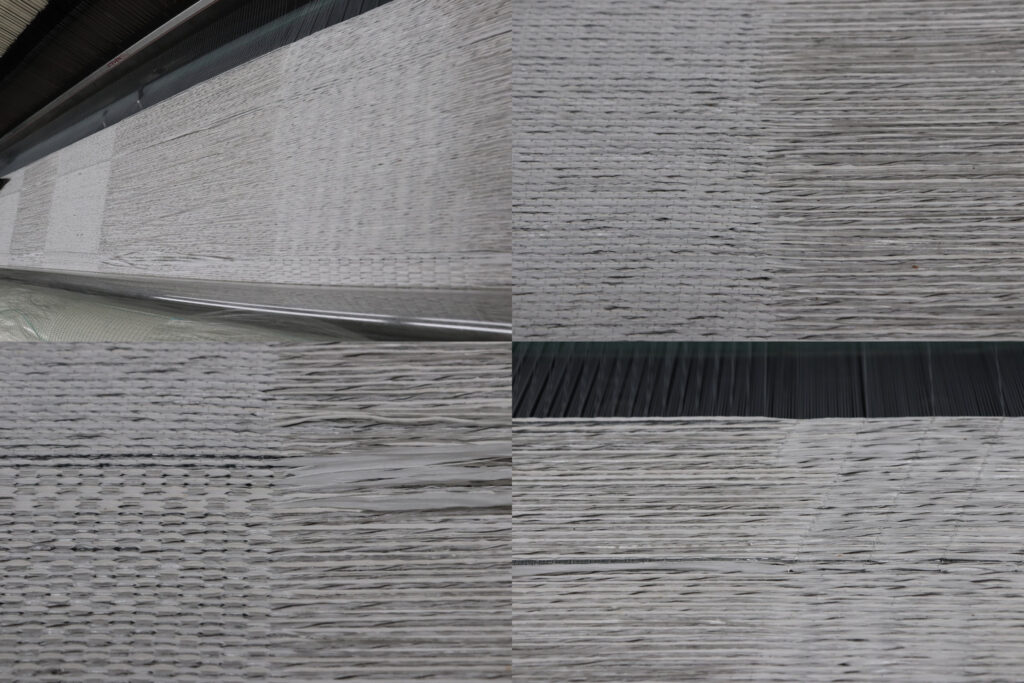
First of all the PA6 have to be pre-dried to avoid air bubbles in the filament. The dried polymer is than filled in the feeder and dosed into the extruder. In the cylinder the polymer is melted via temperature (heater bands) as well as friction, conveyed via the screws and pressed through the hole-die to form the round filament (diameter of 1.75 mm). Afterward the textured surface is created by the embossing roller. The diameter of the filament is adjusted with the haul-off speed. Last but not least the cooled filament is spooled via a winding unit.
- What technologies are used to create the textured filament?
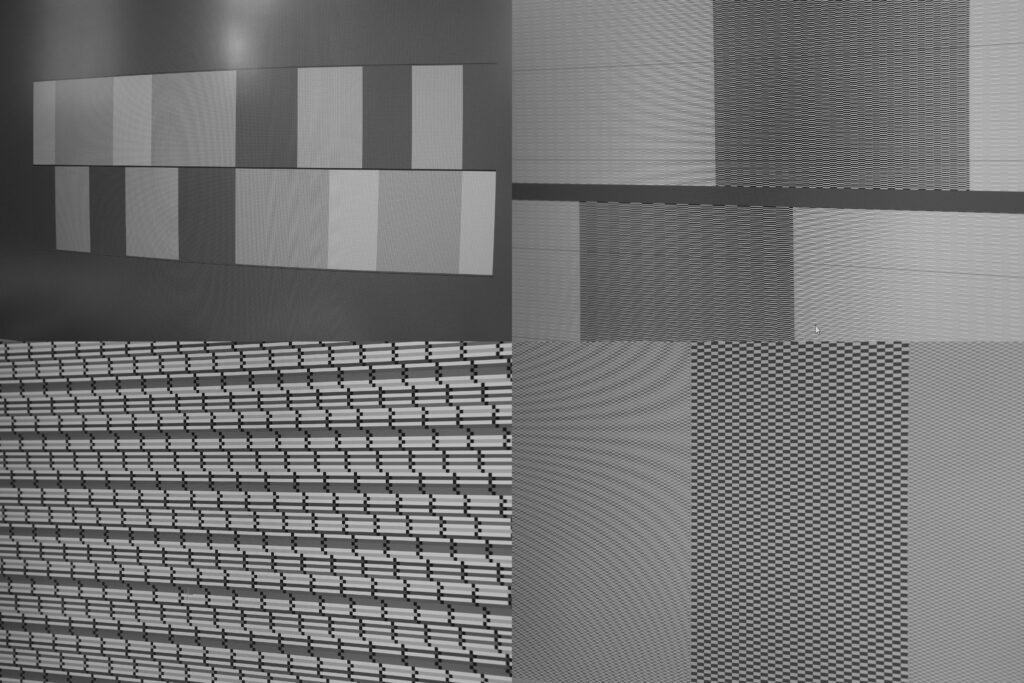
The basic technology is extrusion, a continuous process to produce plastic products (3D printing filaments, decking profiles, pipes, films etc.). For the shaping a simple hole-die were used. In contrast to a standard filament extrusion, an embossing step was necessary to create the textured surface.
- What was the most challenging part to produce this filament?
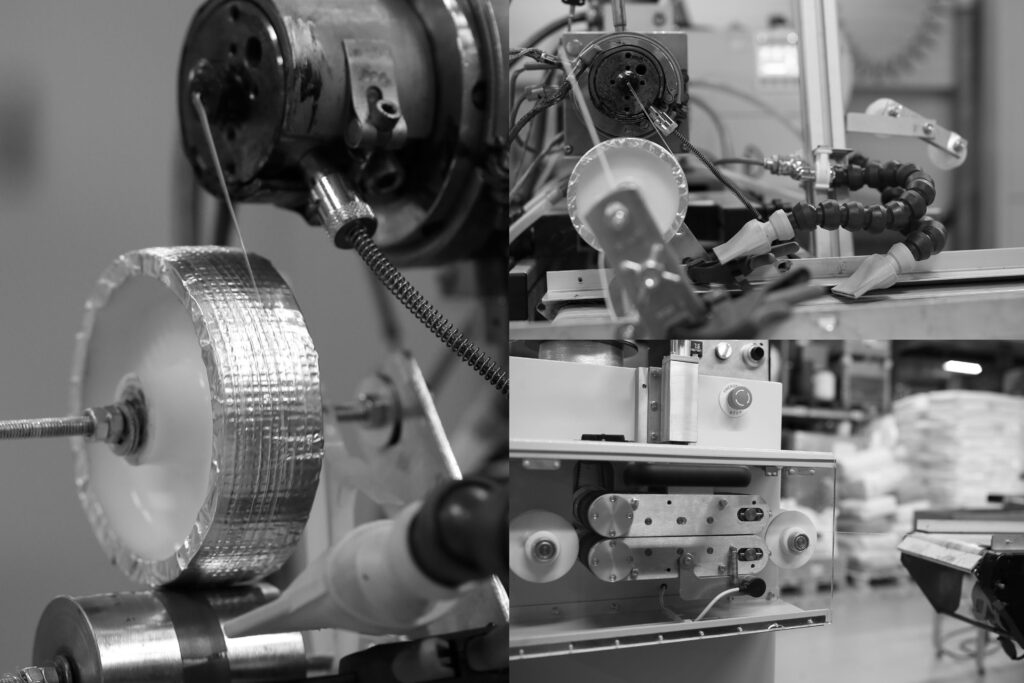
The most challenging part was the development of a suitable embossing roller and to define the proper amount and positioning of the rollers. The following figures show the different development steps from the first idea and prototype to the final version with embossing and pressure roller. To reach the final diameter of 0.5 mm it was necessary to stretch the filament. This was done by increasing of the haul-off speed. It was challenging to find the right balance between the output rate of the extruder (kg/h) and the haul-off speed (m/min). Furthermore, a serial production is different to a test operation. To reach a constant filament quality, various factors have to be considered, beginning from the pre-drying of the material.
- Do you think using the melt coating technique will work to create the original concept of the Adaptive Archi-Filament? (Some trials with mix polymers were interesting, but needed to be further researched)
We think it is possible to produce the Adaptive Archi-Filament (polymeric filament with an urge to build frizzed structures encapsulated with a water-soluble polymer) with the melt coating process. But not with the current available equipment and material combination. A collaboration with toolmakers would be necessary. In the frame of a bachelor or master thesis the right raw materials and material combination could be investigated. A realistic time to get what you want and to produce a filament which meets your expectations would be one year and more (depending on budget).
- What is your advise in terms of our collaboration follow up in the future? How do we step forward?
Of course we are interested in a further collaboration. One possibility would be to look for a suitable funding pool. I think the best idea would be a meeting after the completion of the Re-FREAM project and trials at TextileLab. Together we should create a kind of specification sheet. This should include the expectations and technical requirements.

–
*TextileLab knitting test
The process of TextileLab Tilburg started with developing knitted samples. It´s the first time for me to work on creating knitwear. I instantly realized that this process is way different compared to weaving. The knitting product developers did not completely understand me, because I was using a lot of weaving development terminologies. So, it was important for me to learn about the knitting process step by step.
It is possible to combine weaving with knitting. I decided to apply the Adaptive Archi-Filament as an ”inlay technique”, meaning that this yarn will be laying between the knitted structures. These straight open lines will allow the Archi-Filaments to tangle into a new shape. The looping effect will push towards the knitted structures, meaning that this movement will create organic shapes to the textile.

The interesting part of knitting is that you can create curved shapes within the outline of the fabrics. With weaving you can not do this, because you are always limited within a square frame. This means that curved patterns can be cut out of the square fabric, but left over fabrics will become waste. My reaction to this is that I will limit myself to a woven square, creating the maximum amount of shape, by using the Archi-Filament. With the knitting development I want to create curved knitted shapes, in combination with adaptive yarns. It’s very interesting for me to think about creating knitted diagonal lines, without making any waste.
Damien Semerdjian prepared some experimental fabric samples, showcasing the basics that we would probably need. It was interesting for me to see what kind of binding we can apply. He surprised me with the inlay techniques. I did not realize that you can create a net texture on top of the loose hanging Archi-Filaments. This already creates a very dynamic 3D shape, but it also does something special with the color effect.
For the first tryouts we used Seacell yarns, in combination with Archi-Filaments and white monofilaments. Damien wanted me to look at the bindings and choose which ones I liked the most. He also asked me to prepare a pattern and select the bindings within the fabric blueprint. These first fabric samples motivate me to experiment more in terms of texture versus color.
In terms of using knitting machines we can choose from: the coarse knitting machine & the fine knitting machine. The difference is that the coarse knitting machine has less needles. The larger needles allow you to add more thicker yarns into the machine. For the first sample we used the coarse knitting machine. But my personal preference goes to using the fine knitting machine. This will match aesthetically with the weaving designs.
–
*Weaving Seacell category
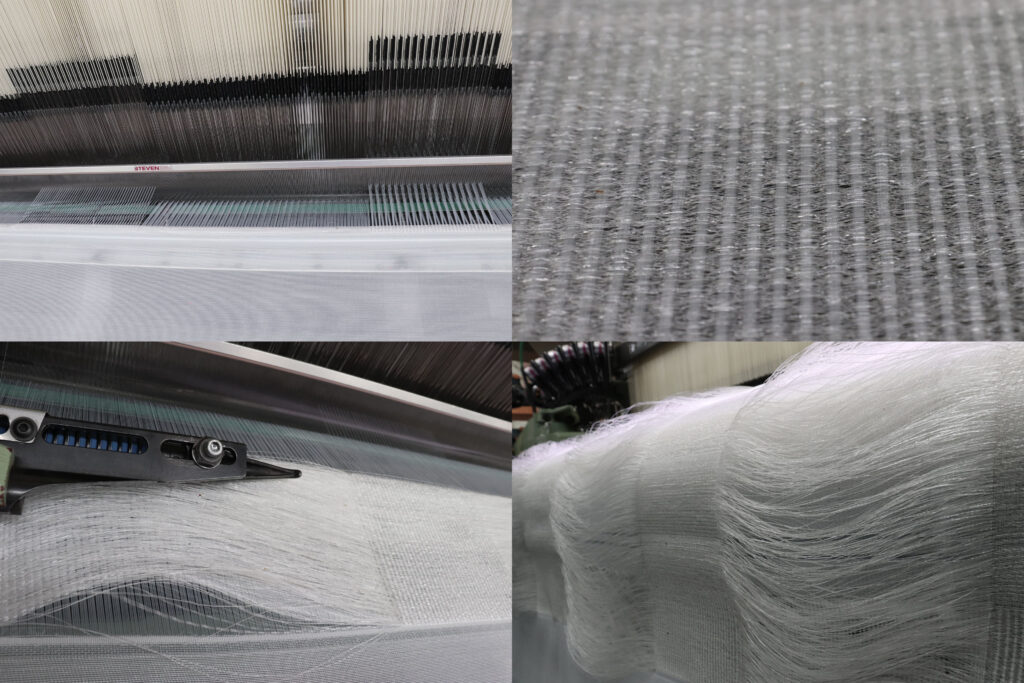
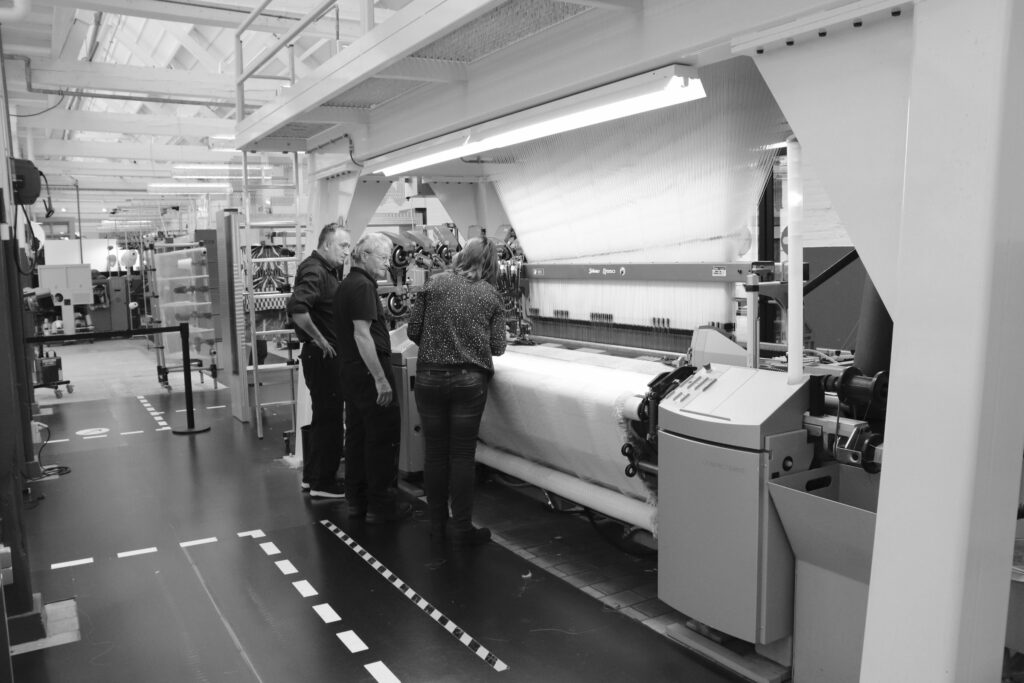
It was a very interesting moment for me to start working on the Marinero weaving production. I have been working on bringing 3D shapes into fabrics with TextileLab since 2014. So, it was very exciting for me to see all these new elements coming together. Within a time frame of a few weeks we needed to produce all the fabrics. I already knew that this was going to be a very intense moment for me. Luckily I had a great team around me that were supporting me throughout the production process.
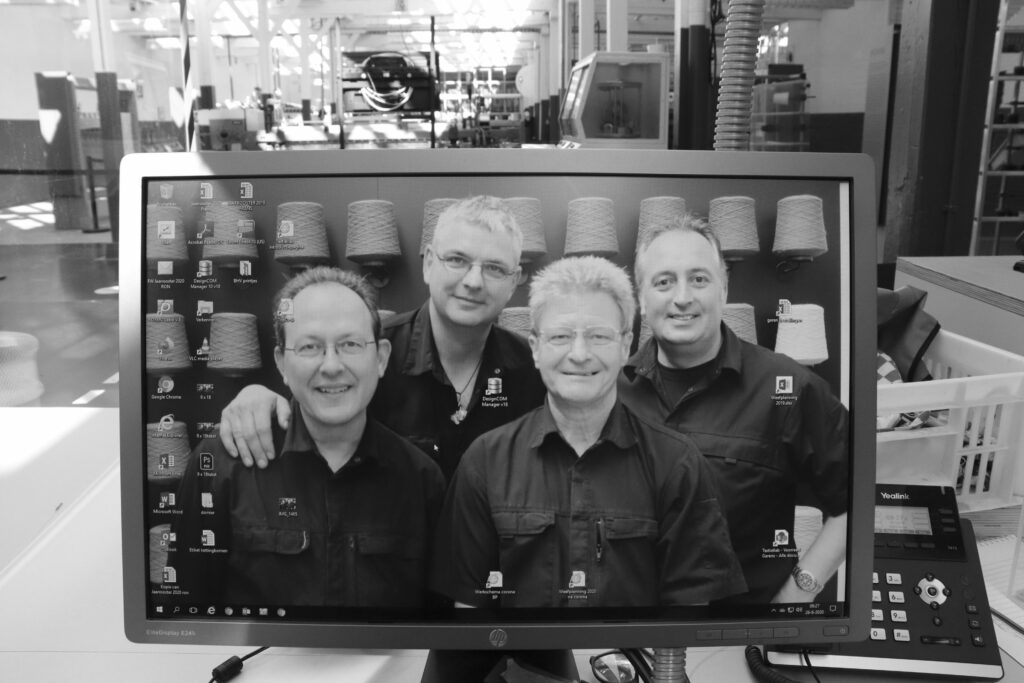
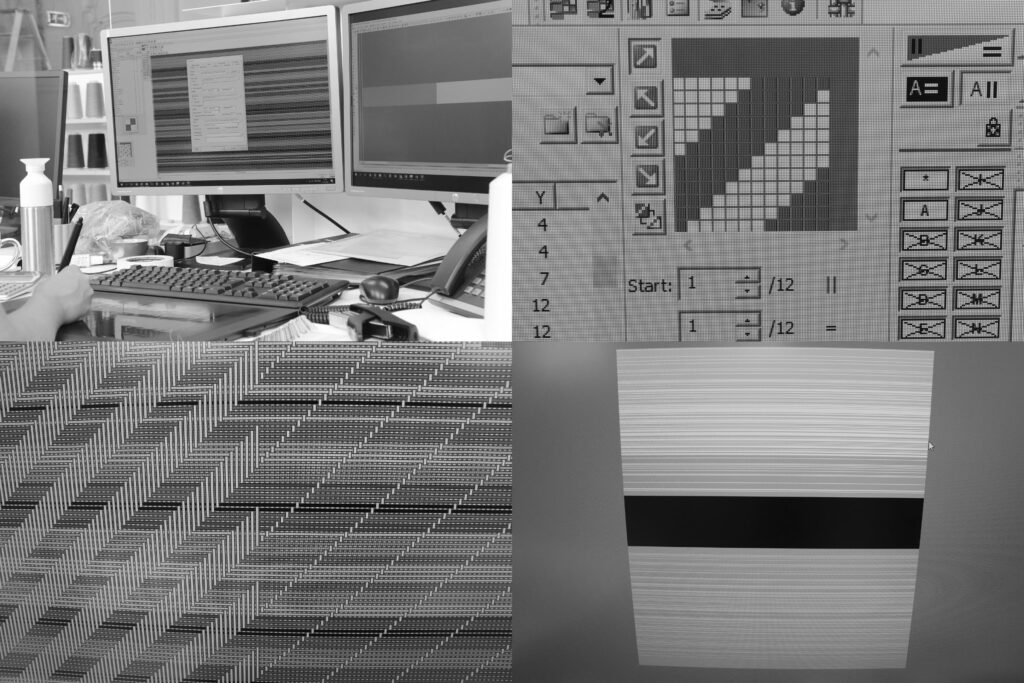
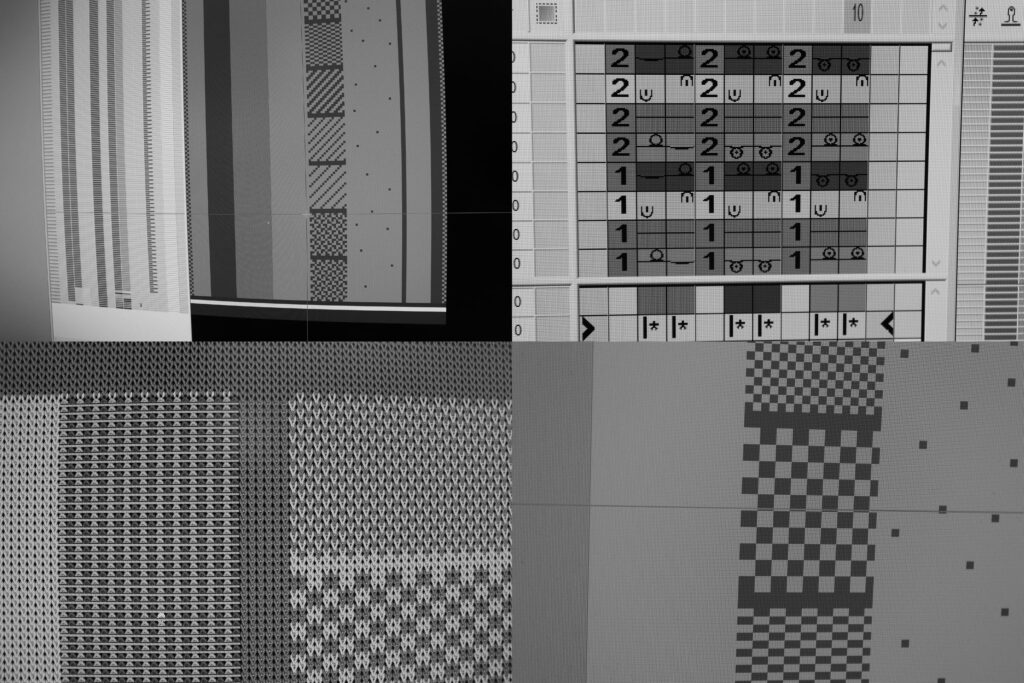
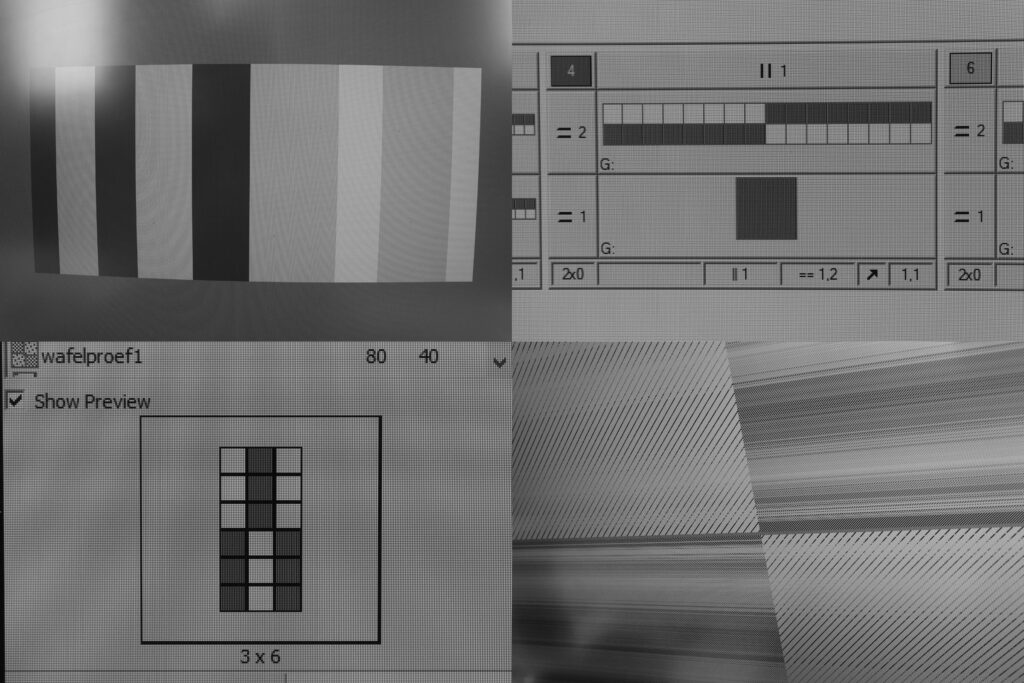
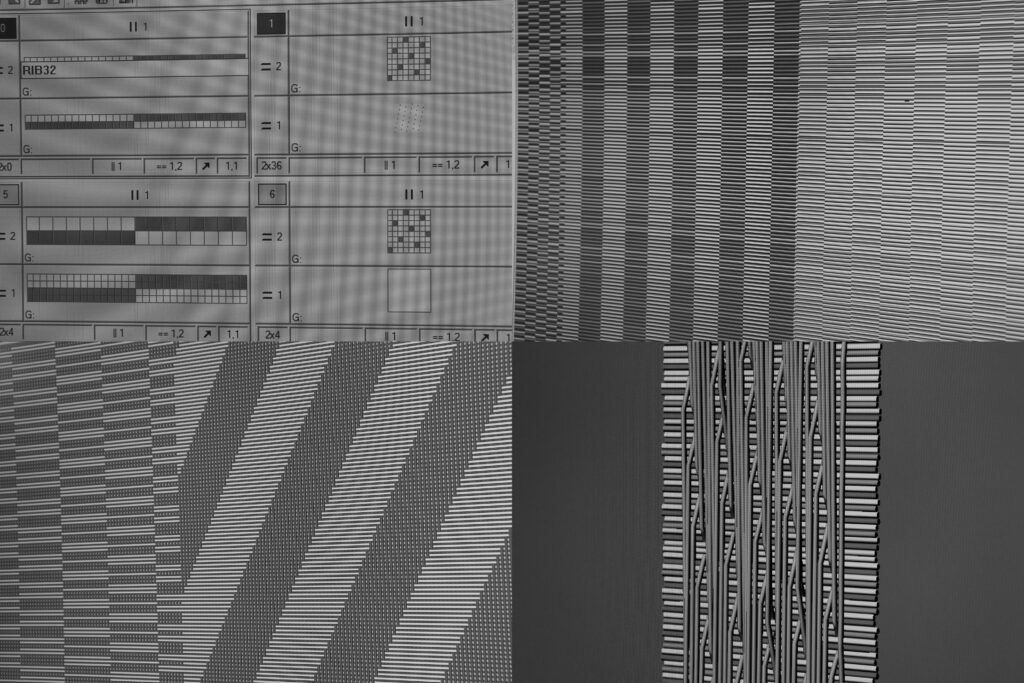
The weaving process started with the Seacell category. My collaborative product developer Judith Peskens advised me to make a work plan for the weaving. We used our time to develop several test weaving fabrics. Each test fabric will be divided into several woven frames. This way we can choose what techniques we want to use for the fabric production. It is important that all changes made are chosen very carefully. Each change that you make can impact the entire process that you are working on. So it is very important that you stay clear and sharp at all times. Having an open mind and clear communication are the main key points that are needed throughout this whole process. Because wanting to change too much can make everybody confused, or even worse -> loosing yourself in all possible options and not seeing the bigger picture anymore.
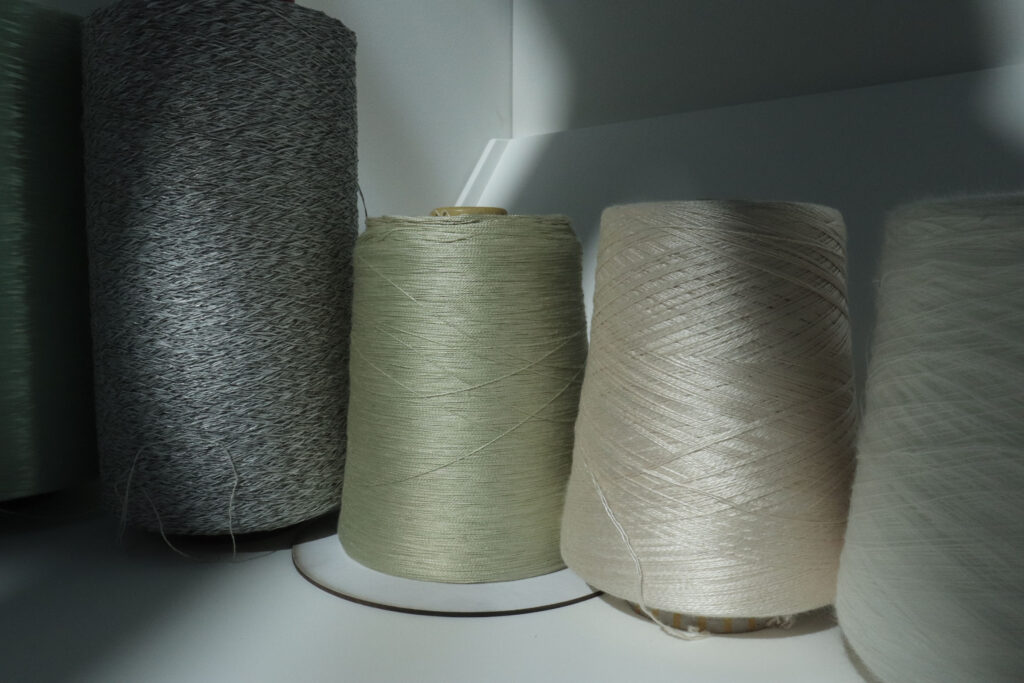
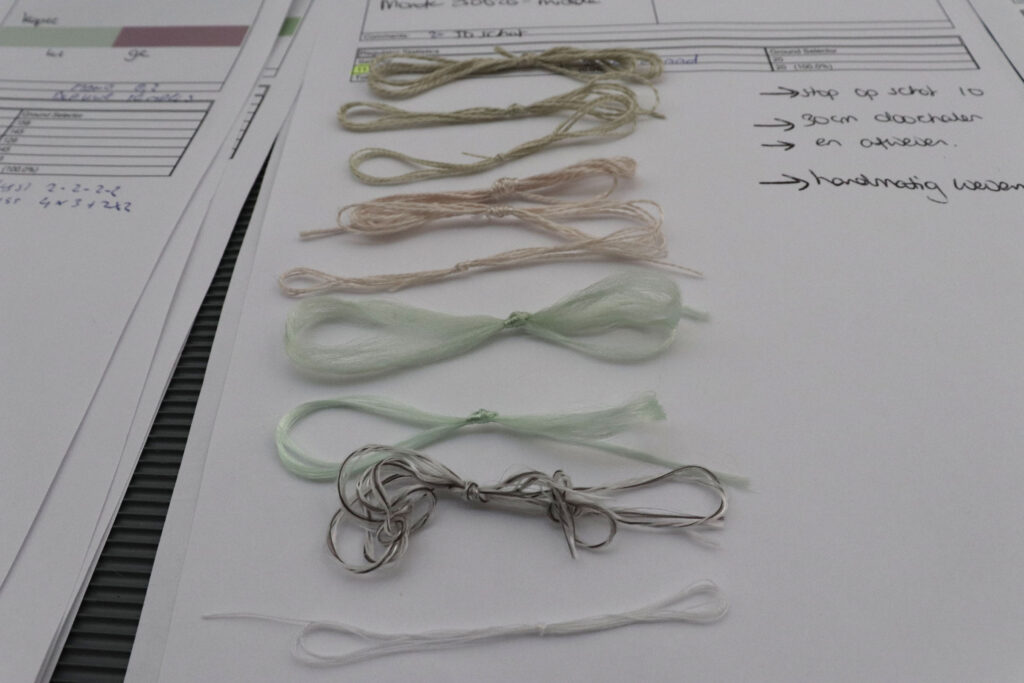
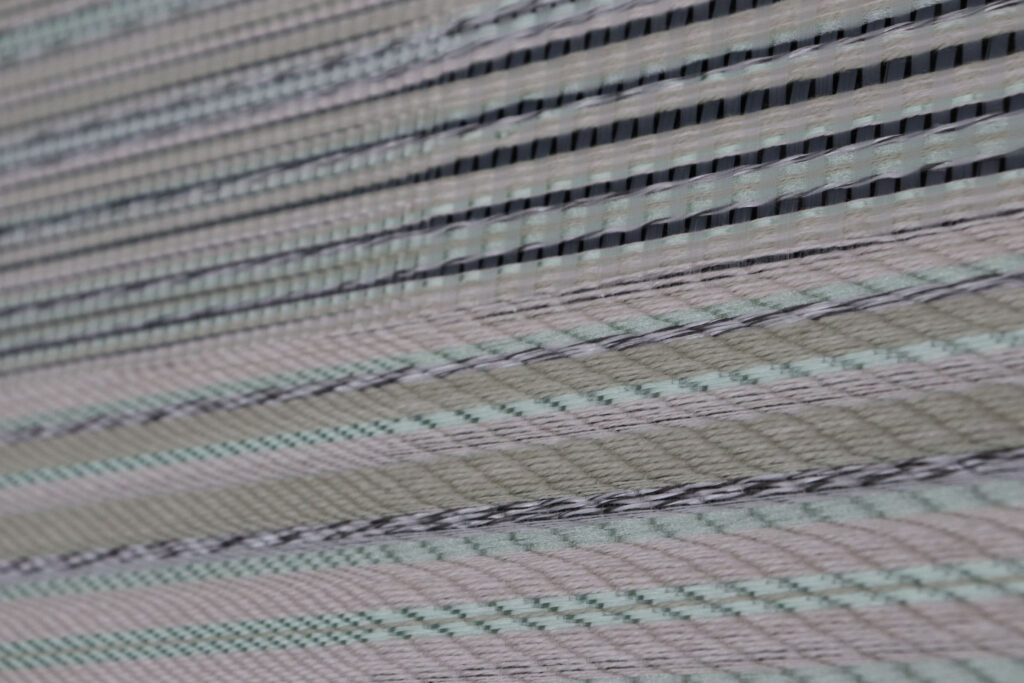
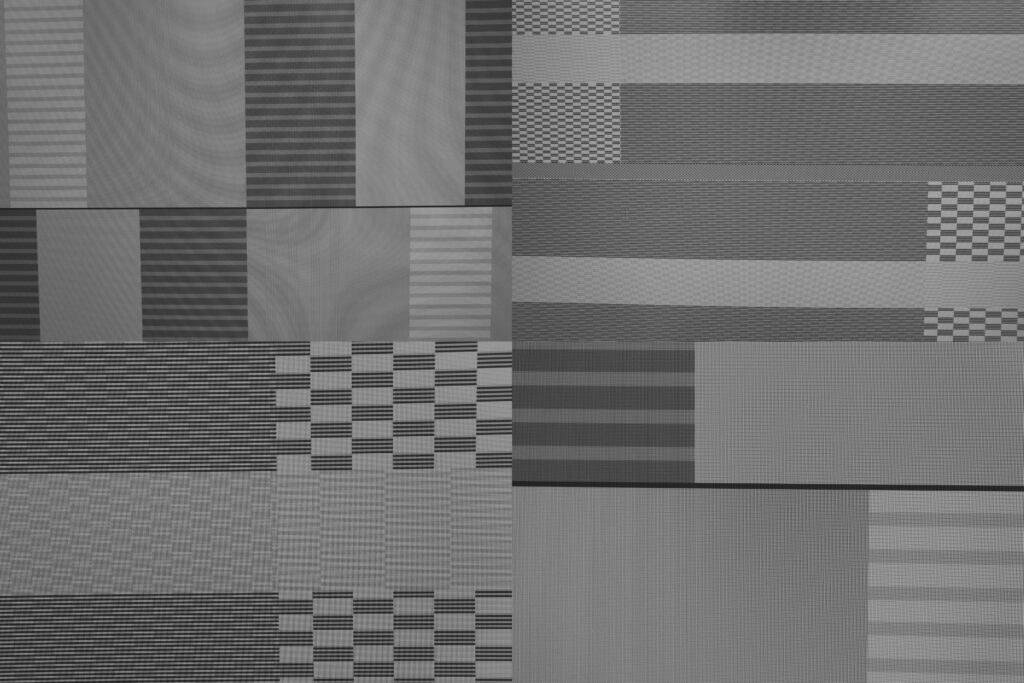
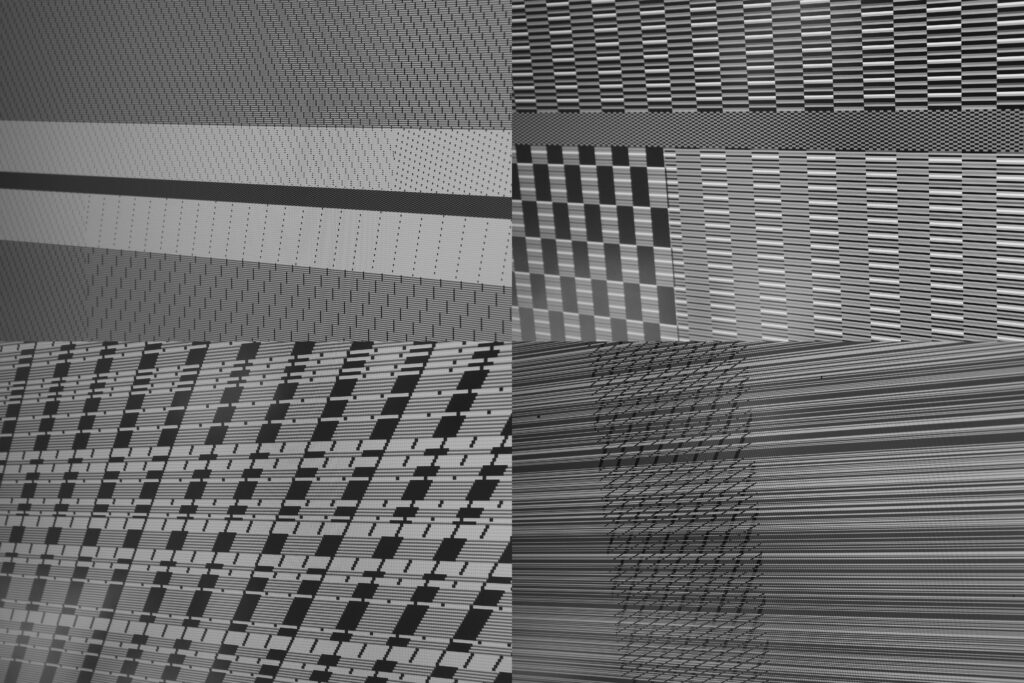
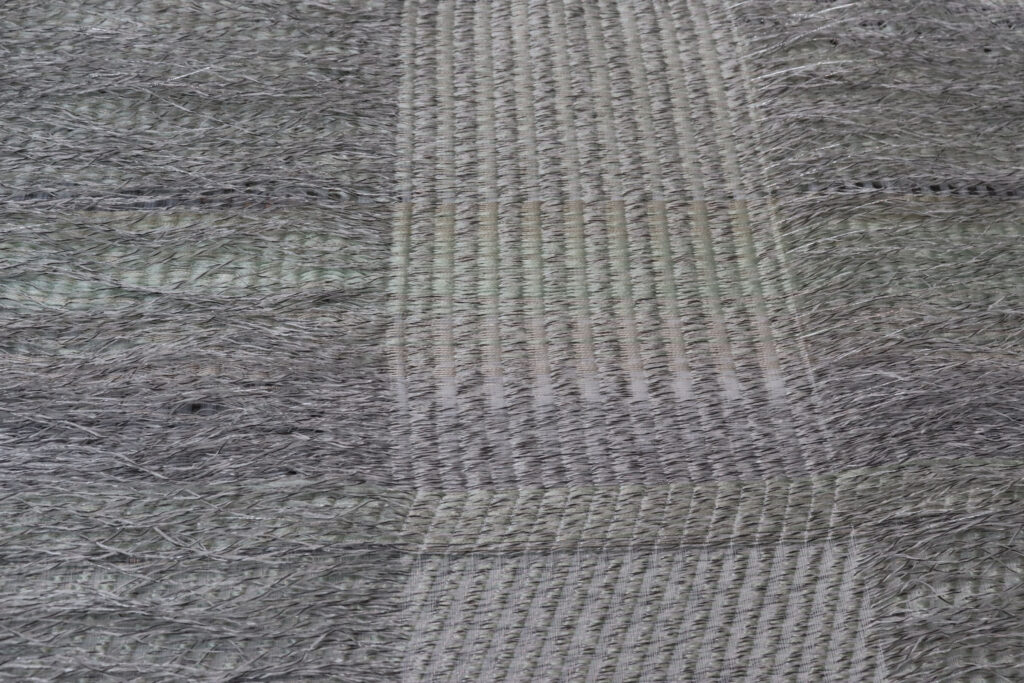
Having a clear prepared plan helped us go throughout this whole project step by step. For the first test we focused on single weaving layers, with several added Seacell yarns. We also added Aitex Archi-Filament, shrinking yarns and Rpet yarns. I really liked the combination of these yarns in terms of color. The techniques and styles that we used are: panama, twill and satin bindings in combination with variable gradient blueprints.
–
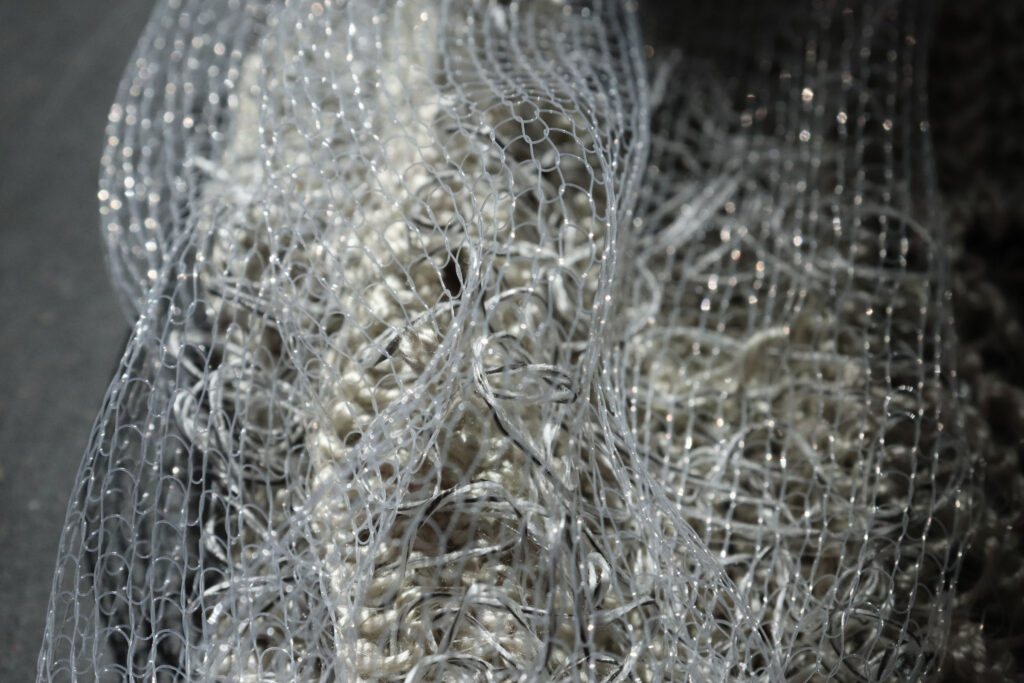
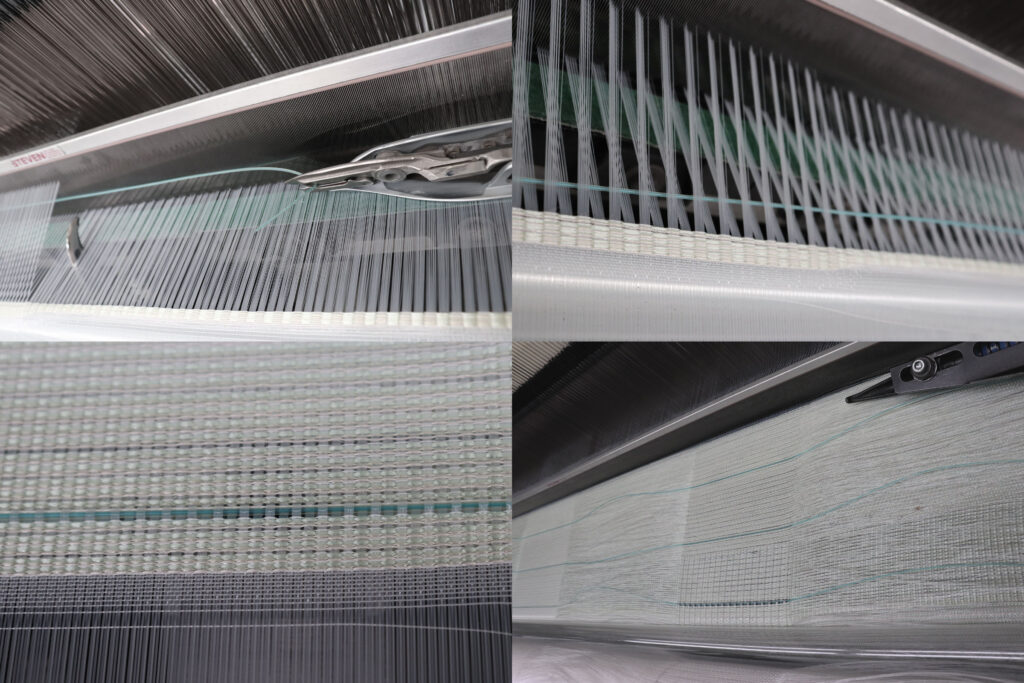
*Weaving WK+ category
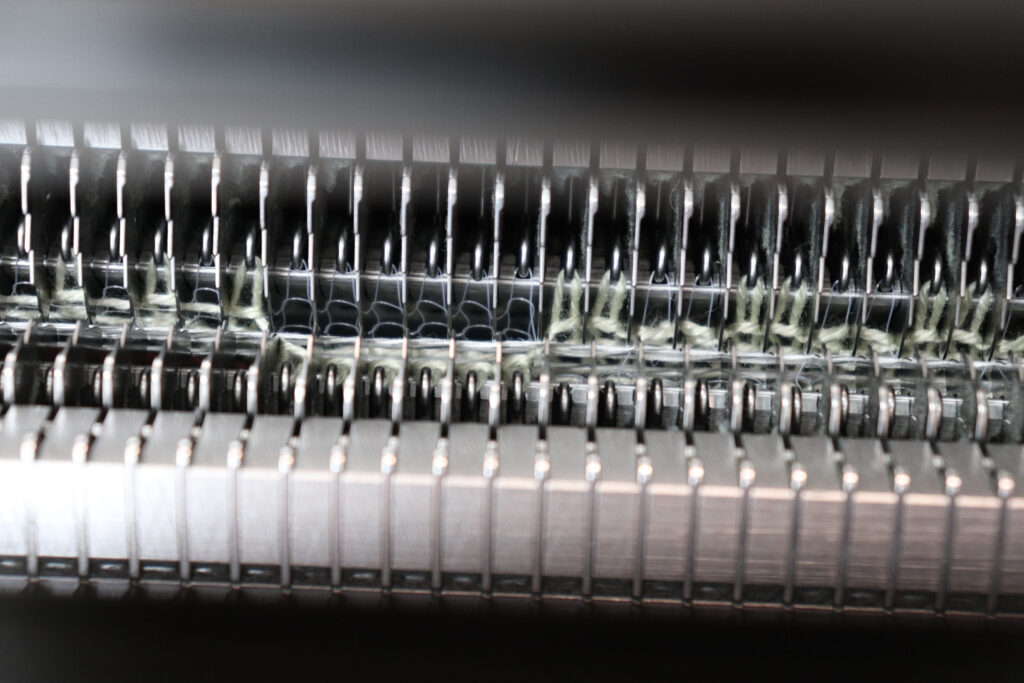
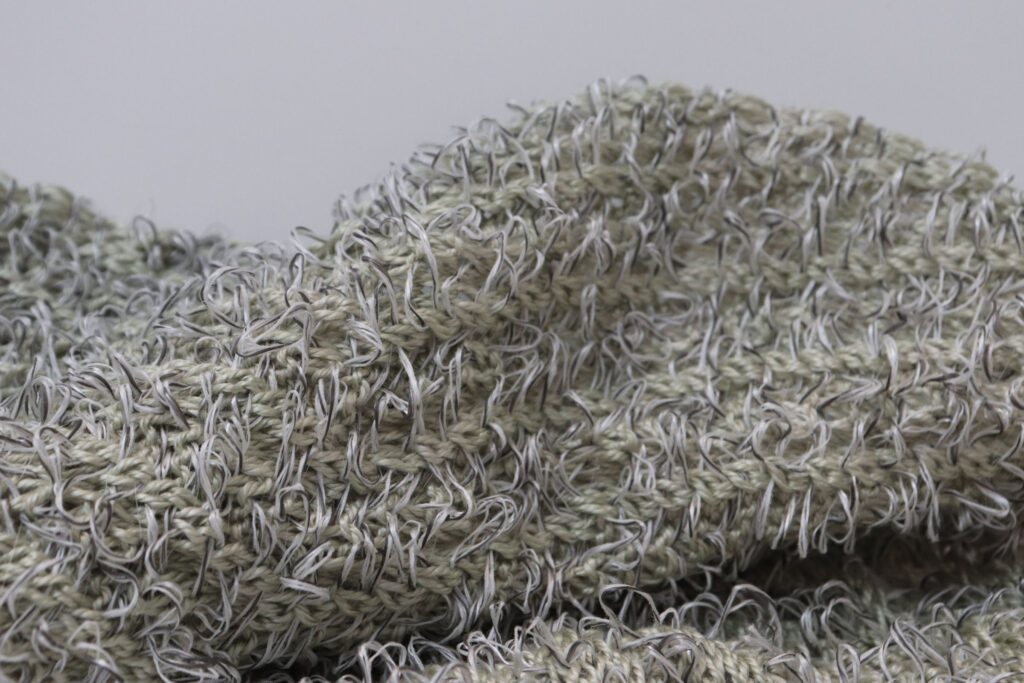
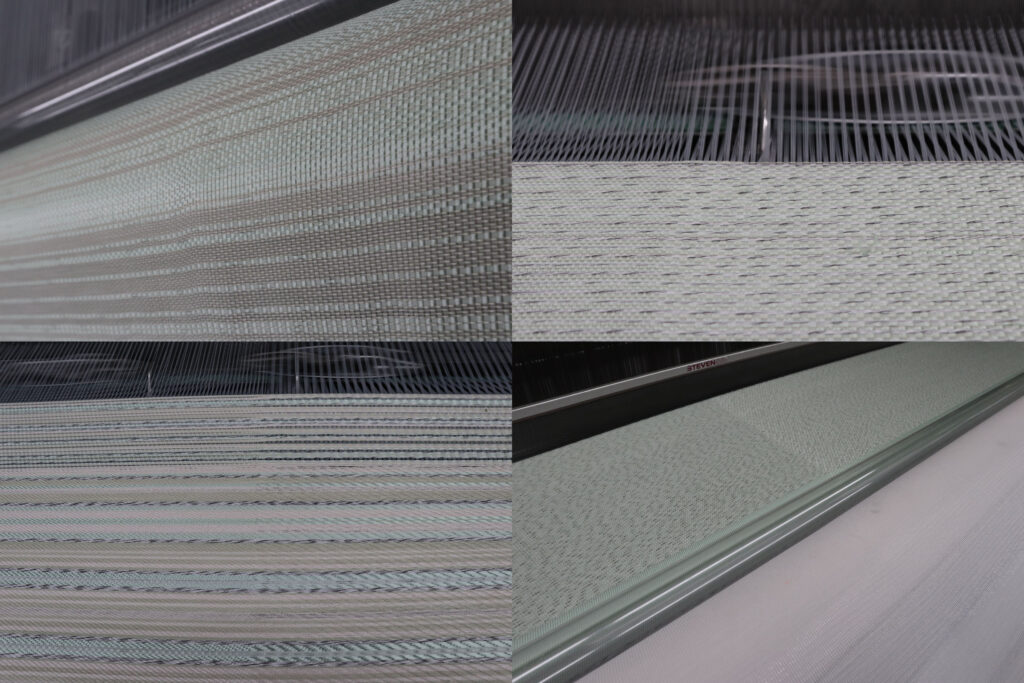
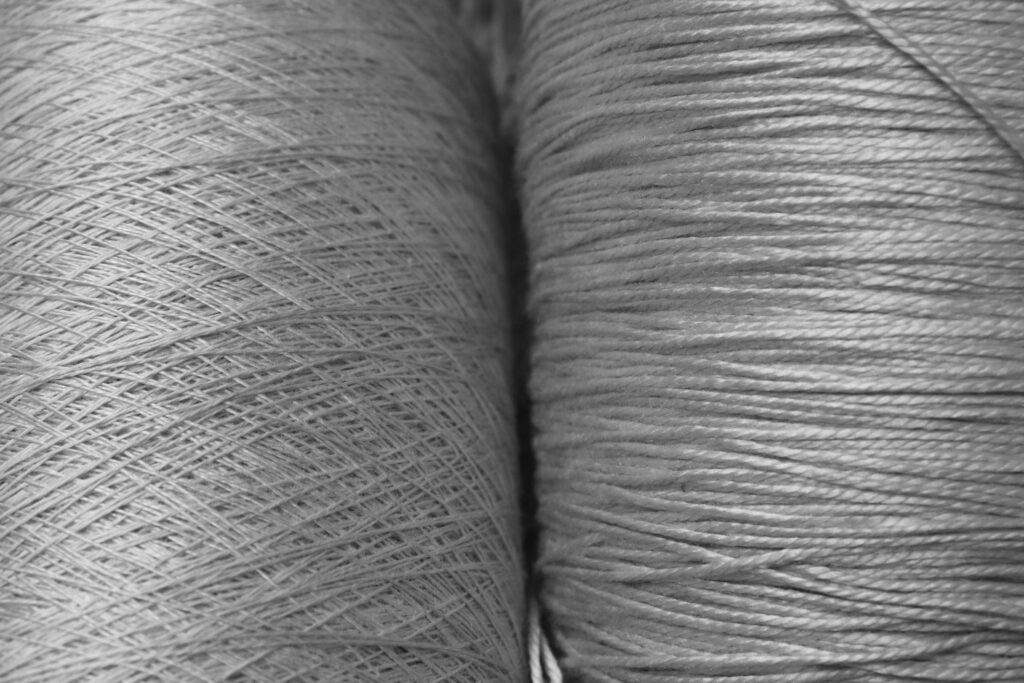
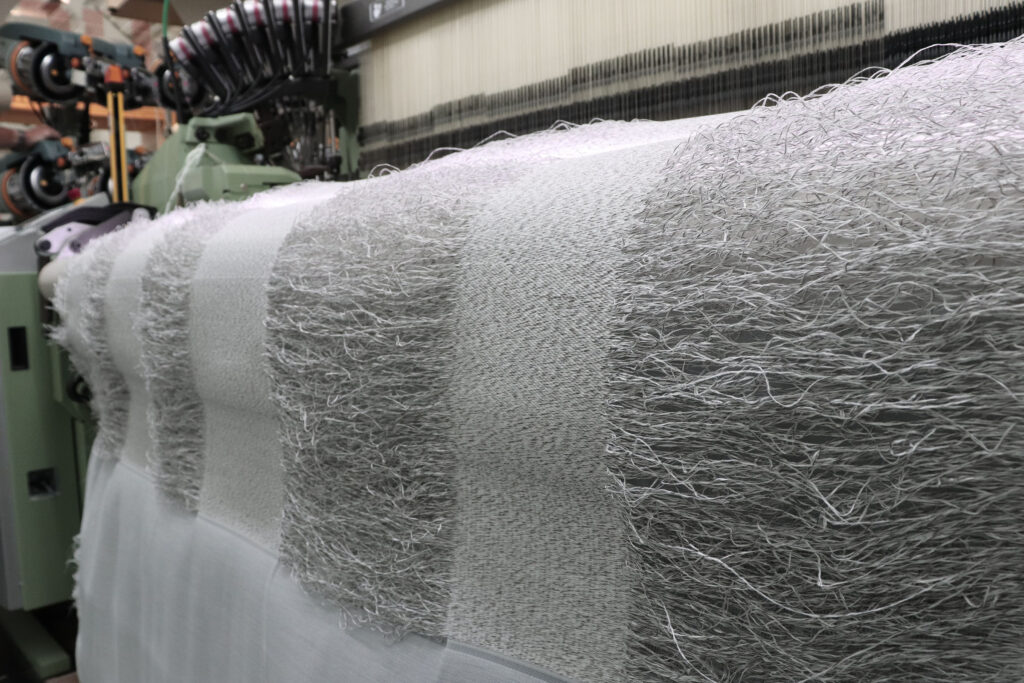
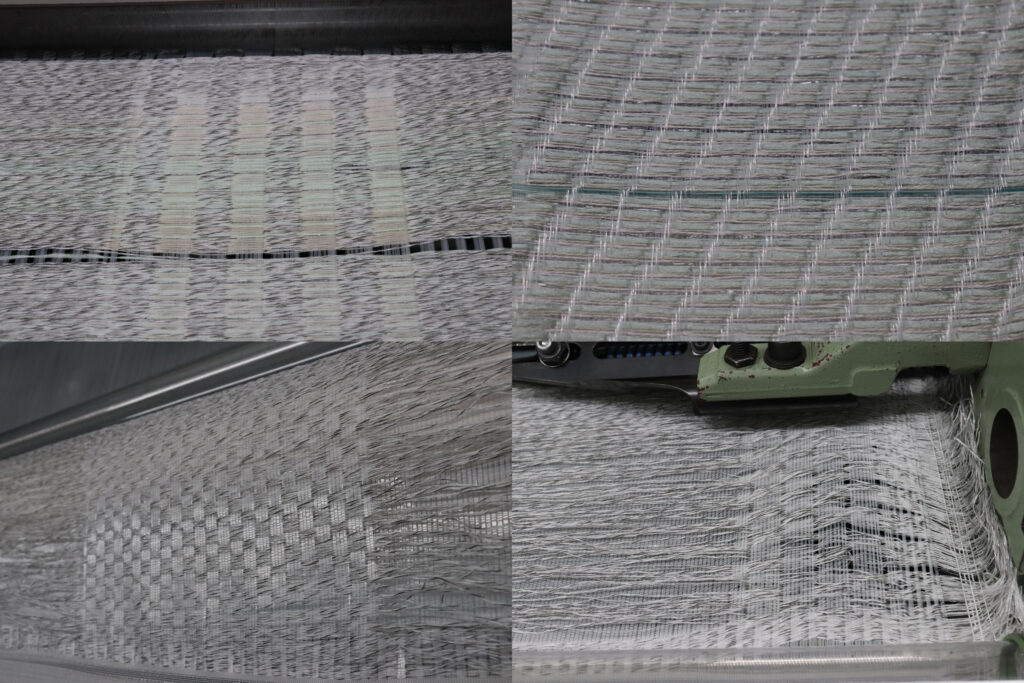
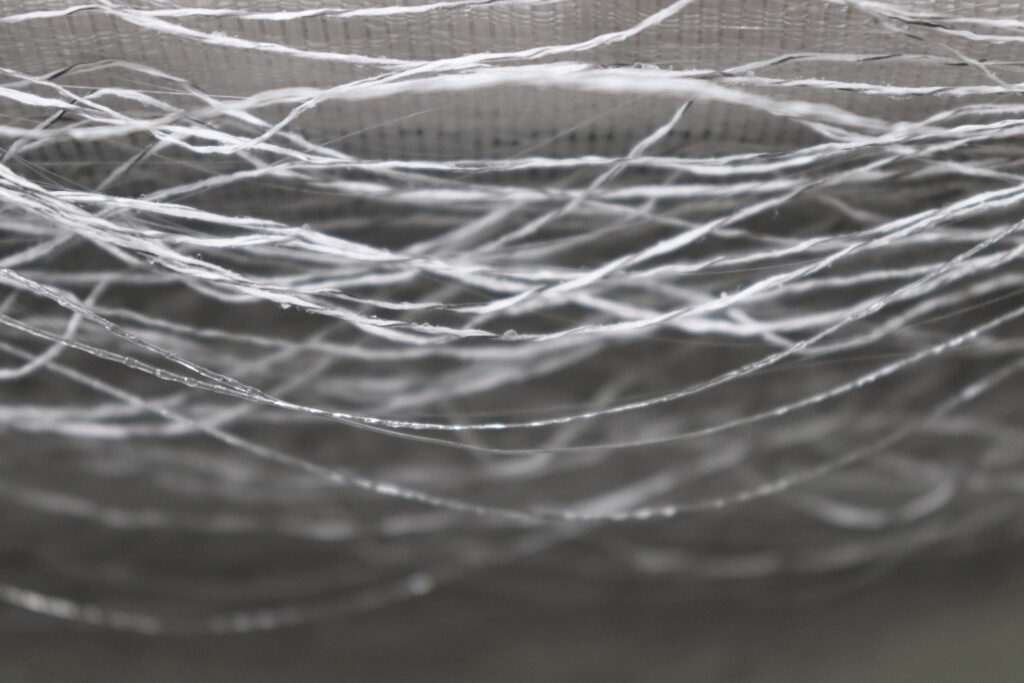
The second fabric category that we worked on was about combining monofilaments. With Wood K Plus we had the test 1 and test 2 filament option. The idea was to create double weaving techniques using the WK+ filaments. It was very surprising to see the textured monofilament within a fabric sample. The effect of test version 1 shimmers like a wet spiderweb. However, test version number 2 was not able to be woven. The maximum thickness that is allowed is 0,4 mm and test 2 is 1,1 mm thick. There was only one solution left: to add all the test version 2 filaments by hand. This was a real time consuming challenge. So, we had to make a strict schedule, with the time left that we had planned for the production.
The technicians were so kind to offer to try and work with the inlay technique. Meaning that they need to cut test 2 by hand and add it into the textile. They need to repeat this process until the fabric is finished. I am very thankful that they wanted to help me with this process. They worked several weekend shifts, in order to finish the whole fabric production. For the entire project we had 6 fabric designs planned using the test 2 filaments. We decided to shift the cm’s for each design:
- Design 1 ( WK+ category ) = repeat process after 7 cm
- Design 2 ( WK+ category ) = repeat process after 14 cm
- Design 3 ( WK+ category ) = repeat process after 21 cm
- Design 4 ( Mix 1 category ) = repeat process after 7 cm
- Design 5 ( Mix 1 category ) = repeat process after 14 cm
- Design 6 ( Mix 1 category ) = repeat process after 21 cm
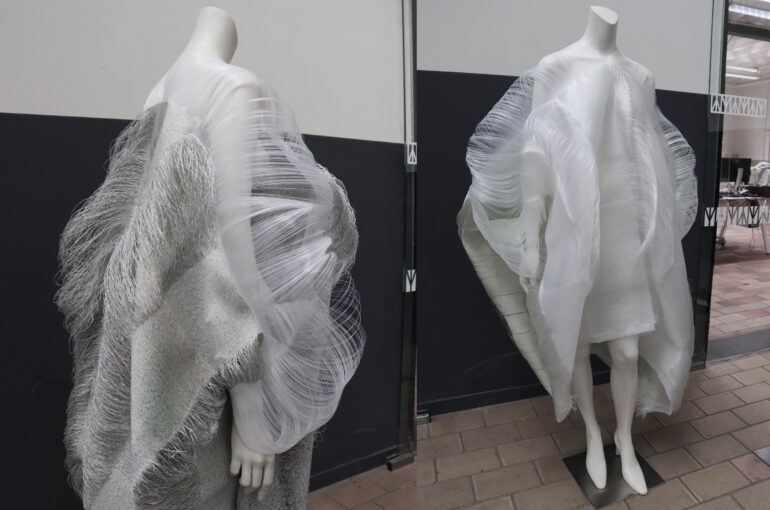
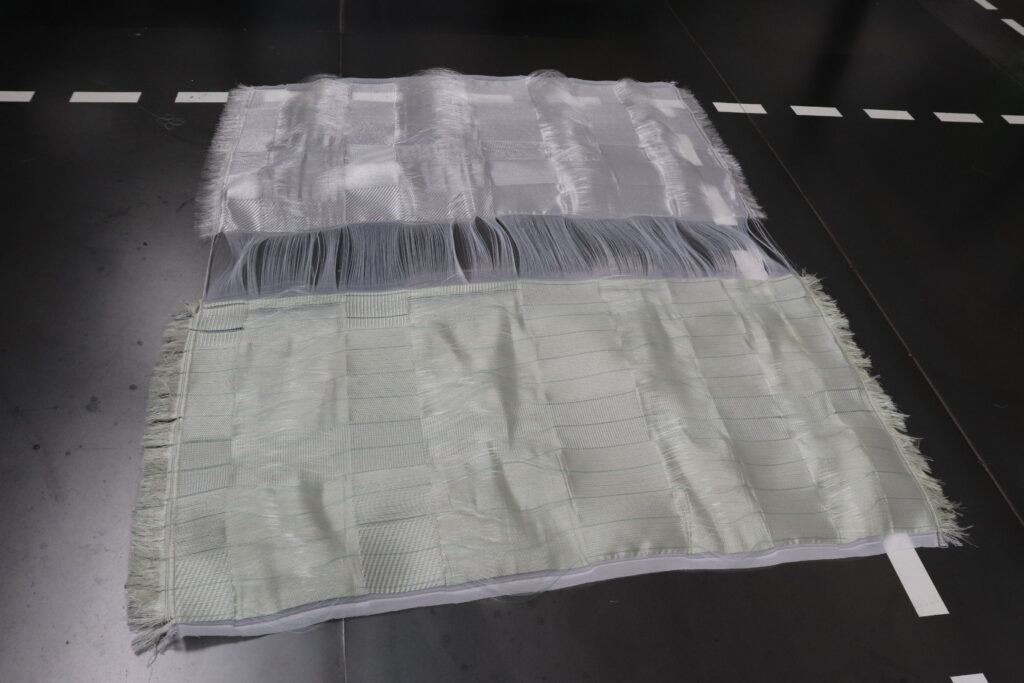
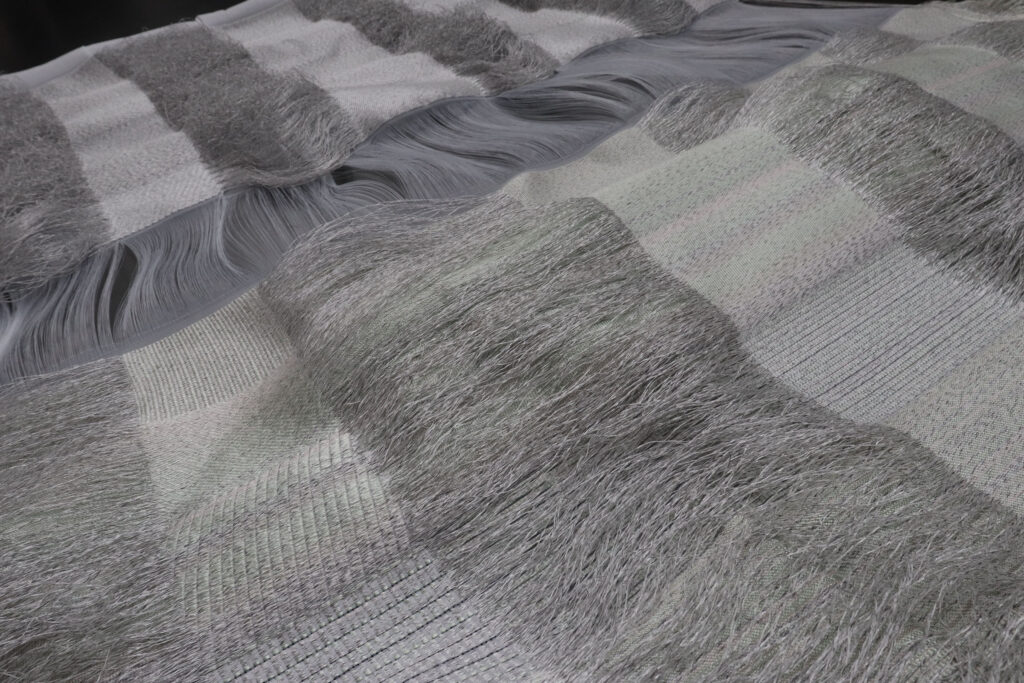
The Test version 2 fabric shows large volume contrasting shapes. After this fabric sample was produced, I draped it onto a TextileLab mannequin. It was very inspiring for me to see the WK+ test 2 fabric shape. This will be very interesting in terms of the tailored by weather effect. The filament becomes more and more flexible during the rain, creating a crystallized melt coating texture. Meaning that the WK+ garment samples will go from monumental round towards wavy volumes.
–
*Weaving Aitex category
During the production process we realized some obstacles that we needed to tackle asap, in order to continue the process. Luckily the team of TextileLab Tilburg was very helpful in finding solutions.
The first obstacle that we were surprised with were the dyed Seacell yarns. It turns out that Carolijn did not spool the yarns correctly onto the cones. During the production process we lost 4 entire cones ( 30 km yarn ). What happened was that the cones wrapped up into a spaghetti mess. I had to contact Carolijn in the middle of the night to ask for her help. She came during the morning to talk about the issues that we were having. There were only a few options left: I needed to choose the best looking quality yarn cones. The TextileLab technicians would assist Carolijn to rewind all those thousands meters of dyed yarns.
I was very thankful that all these people were helping me to find a solution for this challenge. We managed to use enough dyed seacell yarns for the entire weaving process. But for the knitting process I had to cancel using the dyed seacell yarns. The reason with knitting is that you need to have perfect spooled yarns, with no mistakes or flaws inside the cones. Knitting is an all way through connected process. Meaning that broken yarns can destroy the whole knitted construction. With weaving you don’t have this issue so much. So, we only used the dyed yarns for the seacell, Aitex, WK+ and mix 1 categories.
The second obstacle was that my product developer found out that there were not enough Aitex cones to produce all the fabrics. What the team from TextileLab did was offering me to duplicate the Aitex yarn. Meaning that we could add these new yarns to finish all the production. I thought this was an amazing solution. We looked for similar quality yarns and twisted these yarns together, almost looking exactly like the Aitex yarn. The only thing is that this new yarn produced at TextileLab did not have any coating or deforming effect. In the end it was the best solution, because these 2 yarns together give a beautiful quality to the final fabric design.
I learned that in the end we had some major challenges, but working together helped the entire project rising to another level. It seems to me that all these things needed to happen, in order to make the final design even better. It was a very interesting experience for me. We were able to do everything that I was hoping for. I am proud and happy with all the support and genuine help that came along the way. There is always room for improvement, but I am hoping to learn and grow step by step.

–
*Weaving Mix 1 category
The last step made for the weaving category was a very surprising one. For the mix 1 category I initially wanted to mix the Re-FREAM developed yarns and add several yarns from TextileLab. But during the first fabric sample I realized that I wanted too much of the good stuff. I informed my product developer to cancel all initial plans for the mix 1 category and start over again. I focused on just wanting to combine the WK+ with Aitex yarns and make a beautiful marriage between those two.
I was lucky that we had room left to cancel one initial idea and to reproduce an entire new idea. Judith and me had a discussion on what would be the best way to rethink this process. We decided to go an entire new direction using as less yarns possible. To focus on a few elements and create the fabrics based on the yarn characteristics. We wanted to go more fragile while using stiff yarns. So, we had to focus on making the fabric structure more open and loose.
The most important focus was to design the fabric in a very fragile way. This would allow the adaptive yarns to move around through the structures more easily. We needed to frame the fabric blueprints all the way through. Meaning that these frameworks would hold the whole structure together and not able to burst around the edges. The first mix 1 fabric test that we did was way to firm and bulky. So, we downsized the yarn options by just combining the Aitex with the WK+. It turned out that yarn limitation allowed us to research a wider spectrum of complex binding techniques.
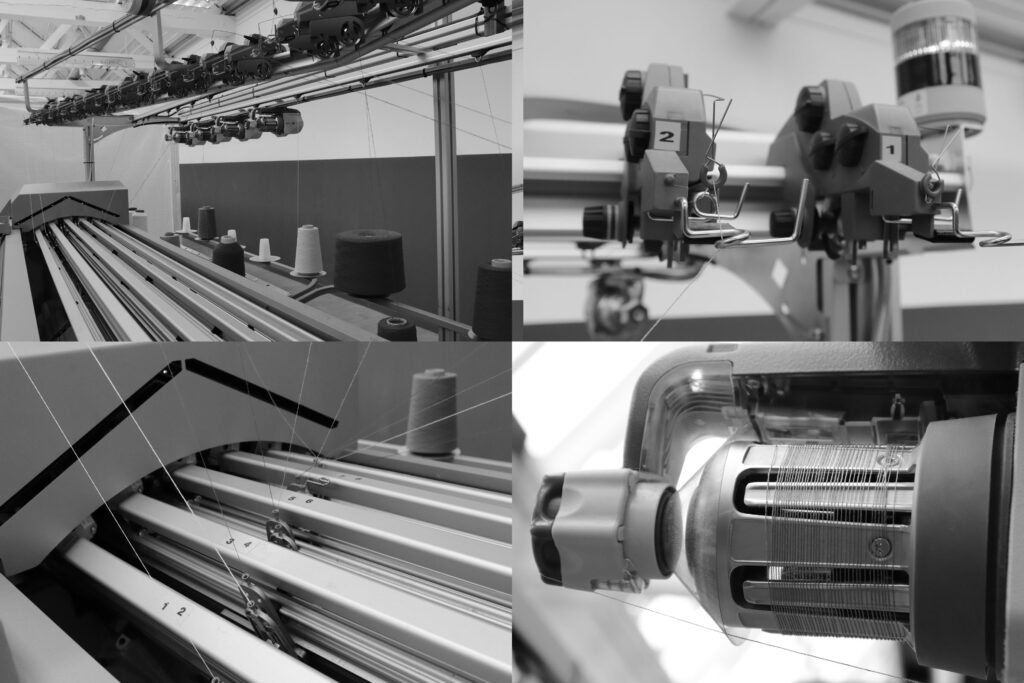
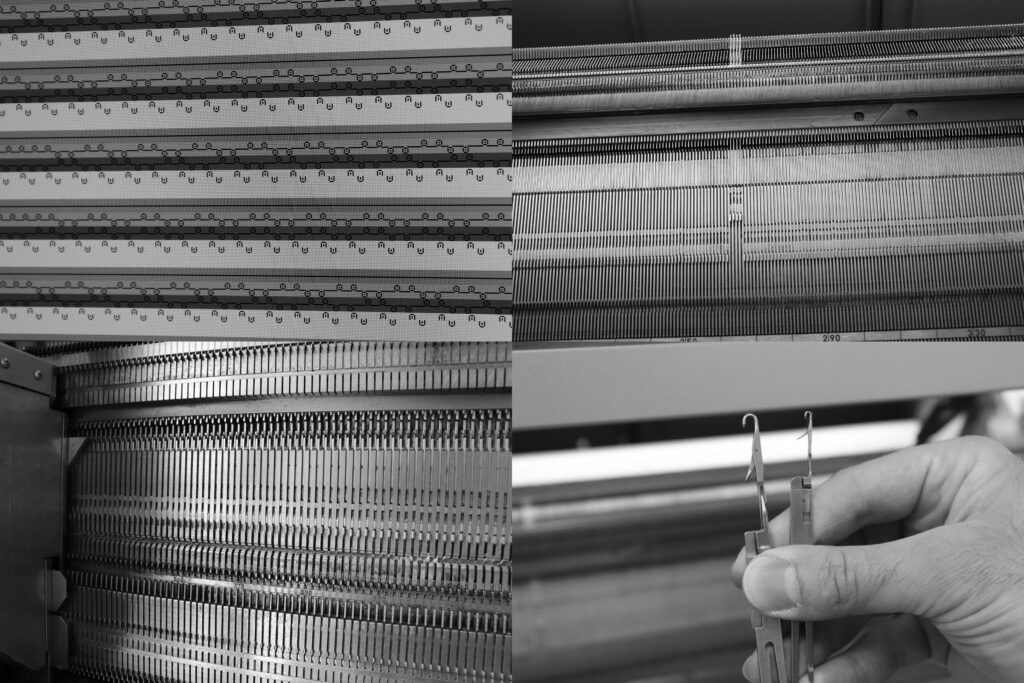
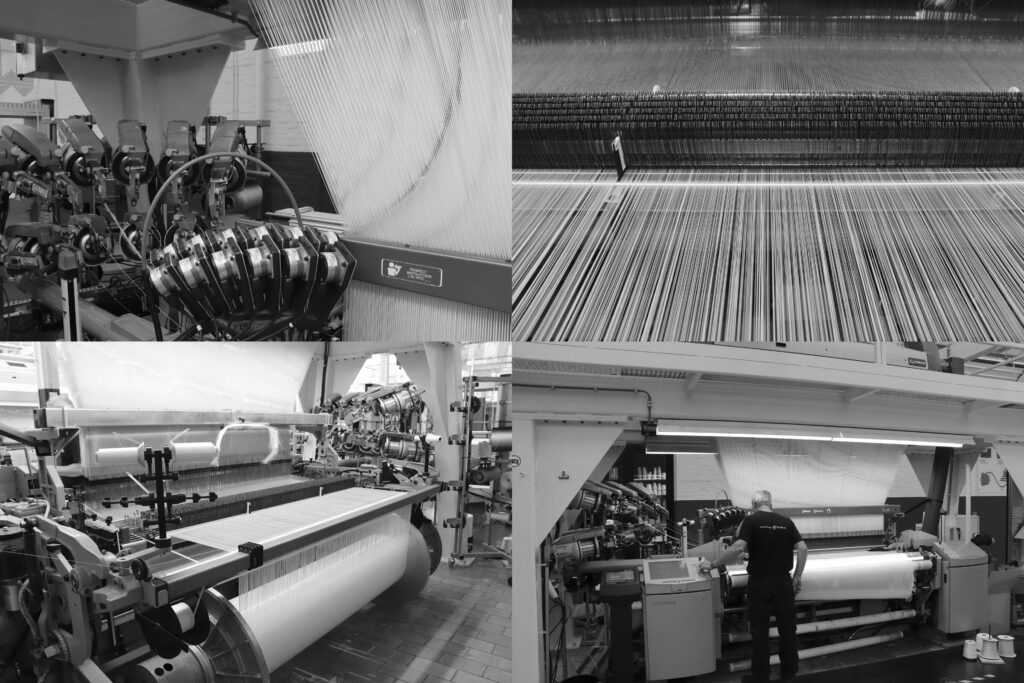
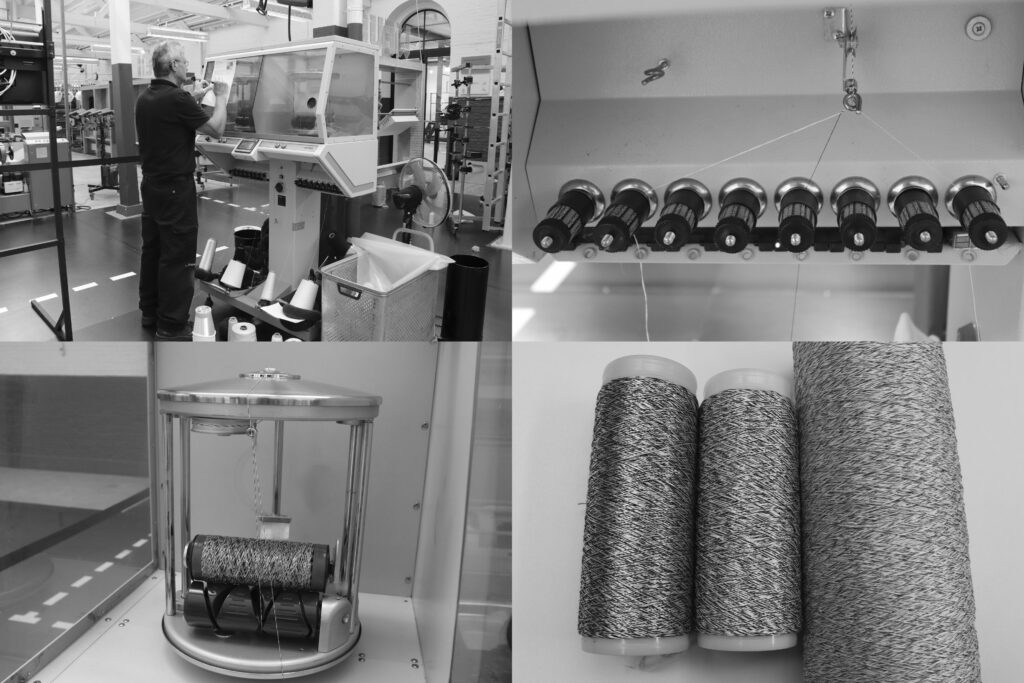
TextileLab weaving production steps made to create the Marinero fabrics:
- Adding the monofilament warp onto the weaving machine
- Product developer & designer blueprint evaluation
- Product developer preparing the digital blueprint programs
- Technicians installing all the correct yarns for each fabric
- Technicians correcting and re-spooling pre-produced dyed yarns
- Product developer preparing all the production documents
- Technicians twisting new yarns to complete the production
- Designer putting the fabric prototypes on the mannequin
- Product developer & designer evaluating fabric on mannequin
- Product developer last adjustments, based on mannequin evaluation
- Weavers producing the fabrics, based on production documents
- Weavers manually adding thick filaments by hand if needed
–
For more info visit: www.studioadaptiveskins.com
Author: CRE - Wolfgang
Wolfgang is communication manager for Re-FREAM and project manager at CREATIVE REGION Linz & Upper Austria.